Third-Party Authentication
Toolkit can also be authenticated using UAA provided by CloudFoundry. This requires some configuration, both on the UAA server and in Toolkit.
Configuring the UAA server locally
The UAA server will require configuring a client application for toolkit, eg setting the redirect_uri.
An example “login” client is already provided in UAA by default, which will be used for the example.
Example:
First, deploy the UAA server locally and install the CF UAA Command Line Client (UAAC) as detailed here.
Target the local UAA server by running
$ uaac target http://localhost:8080/uaaAuthenticate as the default “admin” client by running
$ uaac token client get admin -s adminsecretUpdate the example “login” client’s
redirect_uriby running$ uaac client update login --redirect_uri http://localhost:8000/api/v1/uaa/callback.Now authenticate as the example “login” client by running
$ uaac token client get login -s loginsecretCreate a new example user by running
uaac user add test1 --emails test1@test1.com --password test1
The UAA server is now configured. We can already send a request to the redirect_uri callback through logging in the UAA server using the /uaa/oauth/authorize OAuth endpoint of the UAA server.
The oauth/authorize URL needs to be sent with the proper parameters:
To break it down:
response_type=codeLets the server know we want a code in response.client_id=loginIs the name/id of our client application we have on the UAA server/scope=openidIs the OAuth scope which toolkit uses in order to authenticate/create the user on Toolkit’s side with the email and password.redirect_uri=http%3A%2F%2Flocalhost%3A8000%2Fapi%2Fv1%2Fuaa/callbackis the sameredirect_uriwe set on the client application before, except its encoded in order to use it as a parameter.
For further reference: - https://docs.cloudfoundry.org/api/uaa/version/74.24.0/index.html - https://www.oauth.com/
NOTE: One caveat one might encounter is getting authentication errors when trying to log in with the email. Even though the log in form asks for the “email” and “password”, it actually sends the username and password. Therefore, try logging in with the username(type it into the email field)/password instead.
Configuring the Toolkit server
To configure the Toolkit server client application, UAA related environment variables need to be set:
TEXTA_USE_UAAexpects input “False” to disable UAA, which will otherwise be enabled.TEXTA_UAA_URLneeds to be the URL of the UAA server, eg http://localhost:8080/uaaTEXTA_UAA_REDIRECT_URIneeds to be theredirect_urias set on the UAA server client, eg http://localhost:8000/api/v1/uaa/callbackTEXTA_UAA_FRONT_REDIRECT_URLneeds to be the URL of the Angular frontend, where the Toolkit server will redirect the user after a successfulredirect_uricallback, eg http://localhost:4200/oauthTEXTA_UAA_CLIENT_IDneeds to be the client ID, egloginTEXTA_UAA_CLIENT_SECRETneeds to be the client application’s secret, egloginsecret
Using UAA on the front-end
To use UAA with the Angular front-end, it needs to be configured in an environment.ts file.
useCloudFoundryUAAis a boolean. If false, the UAA login option will be hidden.uaaConfis an object with fields for UAA parameters, eg:
uaaConf: {
    uaaURL: 'http://localhost:8080/uaa/oauth/authorize',

    // Callback URL defined on the UAA server, to which the user will be redirected after logging in on UAA
    redirect_uri: 'http://localhost:8000/api/v1/uaa/callback',
    // OAuth 2.0 client application (eg texta_toolkit) id and secret.
    client_id: 'login',
    // OAuth 2.0 scope and response_type
    scope: 'openid',
    response_type: 'code',
}
To log in using UAA, click on the “log in with CloudFoundry” button on the login dialog:
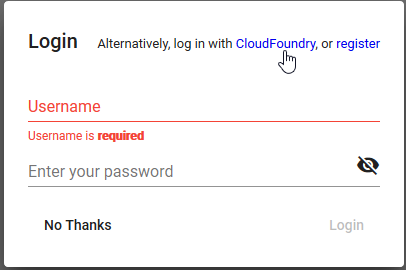
Fig. 1 Figure 22. Log In With CloudFoundry Screen on the Angular Front-end
This will then redirect you to the UAA login screen. After logging in, if the login was successful, it will redirect you back to the Toolkit front-end.
Tests
To run tests on the Toolkit backend, run:
python manage.py test toolkit.uaa_auth
Tests on the front-end are carried through Cypress, in the uaa.e2e-spec.js file.
NOTE: The UAA server has to be running and configured in order for the tests to work.
Notes on authentication
Upon a successful login to the UAA server, sends a callback to the Toolkit redirect_uri callback, through which another request to the UAA server will be made to obtain an access_token and a refresh_token.
To authenticate Toolkit with the access_token, it needs to be attached to the Authorization (HTTP_AUTHORIZATION) header as a Bearer token in requests. Example: Authorization: Bearer 71428a9f2fb44c52be3c17f2fae405f5.
On every request to the Toolkit REST backend, the Toolkit REST backend will send a request to the UAA server to check whether the token is still valid. If not, it will give a 401 response.
Upon a 401 Unauthorized response from the server, the refresh_token token will be automatically sent by the frontend to Toolkit REST backend’s uaa/refresh-token endpoint with the refresh_token attached to the request body under the field refresh_token.
On the Toolkit REST backend, the refresh token will be used to make a request to the UAA server’s /oauth/token endpoint to get a new access_token. If the refresh_token is invalid or expired, the Toolkit REST backend’s uaa/refresh-token endpoint will give a 403 response.
For reference: https://docs.cloudfoundry.org/api/uaa/version/74.24.0/index.html#refresh-token