Authentication
By creating a new Texta Toolkit account (see Fig. 1 item 2)
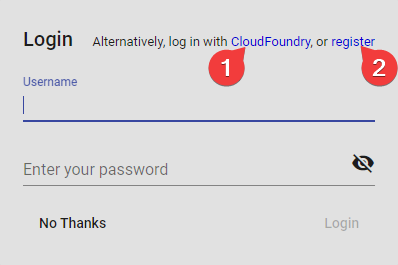
Fig. 1 Login Screen at Startup
Registration
GUI
API
Endpoint: /rest-auth/registration/
Example:
curl -X POST "http://localhost:8000/api/v1/rest-auth/registration/" \
-H  "accept: application/json" \
-H  "Content-Type: application/json" \
-d '{
        "username": "myname",
        "email": "myname@example.com",
        "password1": "a123s456789",
        "password2": "a123s456789"
    }'
Response:
{"key":"7cd98b388e85b82bd084c80418d56a185b3a35ba"}
Response is the Token key that you will later use to authenticate requests.
Logging in
Note
API
Endpoint: /rest-auth/login/
Example:
curl -X POST "http://localhost:8000/api/v1/rest-auth/login/" \
-H "Content-Type: application/json" \
-d '{
        "username": "admin",
        "password": "1234"
    }'
Response:
{"key":"8229898dccf960714a9fa22662b214005aa2b049"}
Response is the Token key that you will later use to authenticate requests.
Third-Party Authentication
Toolkit can also be authenticated using UAA provided by CloudFoundry. This requires some configuration, both on the UAA server and in Toolkit.
Configuring the UAA server locally
The UAA server will require configuring a client application for toolkit, eg setting the redirect_uri.
An example “login” client is already provided in UAA by default, which will be used for the example.
Example:
First, deploy the UAA server locally through gradlew or Tomcat and install the CF UAA Command Line Client (UAAC) as detailed here.
Target the local UAA server by running
$ uaac target http://localhost:8080/uaaAuthenticate as the default “admin” client by running
$ uaac token client get admin -s adminsecretUpdate the example “login” client’s
redirect_uriby running$ uaac client update login --scope openid,texta.* --redirect_uri http://localhost:8000/api/v1/uaa/callback. Setting openid scopes ensures
we have access to the /userinfo endpoint of UAA and the scope texta.* ensure that only scopes matching the pattern are returned.
- Create a group called “texta.admins” with $ uaac group add texta.admins, members of this group will be signed in with the superuser status, which gives
access to all resources and user information. You can change the name of the scope which gives this functionality through environment variables as described below.
- Create a group called “texta.project_admin” with $ uaac group add texta.project_admin, members of this group will have project administrator rights to every
project they have any kind of access to. This includes adding/removing users, deleting the Project and removing indices directly. Adding existing indices is a superuser privilege.
You can change the name of the scope which gives this functionality through environment variables as described below.
- Create a group called texta.members with $ uaac group add texta.member. This group will give the users access to TEXTA Toolkit and can be used
to tie down Projects along with Users that exists in UAA’s groups to denote access. This scopes name can be anything as long as it matches the pattern “texta.*”.
- Create some users and add them in their respective groups::
# This user will be a superuser. $ uaac user add toomas.arusaru –given_name Toomas –family_name Arusaru –emails toomas.arusaru@gmail.com –password 12349876 $ uaac member add texta.member toomas.arusaru $ uaac member add texta.admin toomas.arusaru
# This user will be a Project Administrator. $ uaac user add mati.toom –given_name Mati –family_name Toom –emails mati.toom@gmail.com –password 12349876 $ uaac member add texta.member toomas.arusaru $ uaac member add texta.project_admin toomas.arusaru
# This user will be a normal user with no special privileges. $ uaac user add mari.salumäe –given_name Mari –family_name Salumäe –emails mari.salumae@gmail.com –password 12349876 $ uaac member add texta.member toomas.arusaru
Now authenticate as the example “login” client by running
$ uaac token client get login -s loginsecret
The UAA server is now configured. One can already send a request to the redirect_uri callback through logging in the UAA server using the /uaa/oauth/authorize OAuth endpoint of the UAA server.
The oauth/authorize URL needs to be sent with the proper parameters:
http://localhost:8080/uaa/oauth/authorize?response_type=code&client_id=login&scope=openid texta.*&redirect_uri=http://localhost:8000/api/v1/uaa/callback
To break it down:
response_type=codeLets the server know to add a code in response.client_id=loginIs the name/id of the client application on the UAA server/scope=openid texta.*Is the OAuth scope which toolkit uses in order to authenticate/create the user on Toolkit’s side with the email and password.redirect_uri=http://localhost:8000/api/v1/uaa/callbackis the sameredirect_uriset on the client application before, which will be used to redirect the user to the proper application after a successful login.
For further reference: - https://docs.cloudfoundry.org/api/uaa/version/74.24.0/index.html - https://www.oauth.com/
NOTE: One caveat one might encounter is getting authentication errors when trying to log in with the email. Even though the log in form asks for the “email” and “password”, it actually sends the username and password. Therefore, try logging in with the username(type it into the email field)/password instead.
Configuring the Toolkit server
To configure the Toolkit server client application, UAA related environment variables need to be set:
TEXTA_USE_UAAexpects input “False” to disable UAA, which will otherwise be enabled (Default: false).TEXTA_UAA_URLneeds to be the URL of the UAA server (Default: http://localhost:8080/uaa).UAA_OAUTH_TOKEN_URIURL from which to get access_tokens (Default: {TEXTA_UAA_URL}/oauth/token”).UAA_USERINFO_URIURL for accessing the user information (Default: {TEXTA_UAA_URL}/userinfo).UAA_LOGOUT_URIURL from which to log out with (Default: “{TEXTA_UAA_URL}/logout.do”).UAA_AUTHORIZE_URI= URL to authorize authentication (Default: {TEXTA_UAA_URL}/oauth/authorize).TEXTA_UAA_REDIRECT_URIneeds to be theredirect_urias set on the UAA server client (Default: http://localhost:8000/api/v1/uaa/callback)TEXTA_UAA_FRONT_REDIRECT_URLneeds to be the URL of the Angular frontend, where the Toolkit server will redirect the user after a successfulredirect_uricallback (Default: http://localhost:4200/oauth, should be http://localhost/oauth for Docker setups).TEXTA_UAA_CLIENT_IDneeds to be the client ID (Default: login)TEXTA_UAA_CLIENT_SECRETneeds to be the client application’s secret (Default: loginsecret)TEXTA_UAA_SCOPEScontains the scopes which will be used when communicating with UAA, must be the same as the scopes used during client creation/update inside UAA (Default: openid texta.*).TEXTA_UAA_SUPERUSER_SCOPEcontains the name of the scope which TEXTA Toolkit will use to check if a user should be given/taken the superuser status (Default: texta.admin).TEXTA_UAA_PROJECT_ADMIN_SCOPEcontains the name of the scope which TEXTA Toolkit will use to check if a user should have Project Administrator privileges
for any project they have access to (Default: texta.project_admin).
- TEXTA_UAA_SCOPE_PREFIX contains the prefix for limiting access of users into TEXTA Toolkit. Any users who have a scope that matches the pattern “{TEXTA_UAA_SCOPE_PREFIX}.*”
will be granted access, anyone who doesn’t has it denied (Default: texta).
Using UAA on the front-end
To use UAA with the Angular front-end, it needs to be configured in an environment.ts file.
useCloudFoundryUAAis a boolean. If false, the UAA login option will be hidden.uaaConfis an object with fields for UAA parameters, eg:
- {
“apiHost”:”http://localhost:8000”, “apiBasePath”:”/api/v1”, “apiBasePath2”:”/api/v2”, “logging”:true, “fileFieldReplace”:”texta_filepath”, “useCloudFoundryUAA”:true, “uaaConf”:{
“uaaURL”:”http://localhost:8080”, “redirect_uri”:”http://localhost:8000/api/v1/uaa/callback”, “client_id”:”login”, “scope”:”openid texta.*”, “admin_scope”: “texta.project_admin”, # Must match the value of the environment variable “TEXTA_UAA_SUPERUSER_SCOPE” “response_type”:”code”
}
}
To log in using UAA, click on the “log in with CloudFoundry” button on the login dialog:
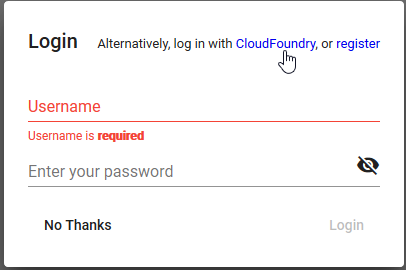
Fig. 2 Log In With CloudFoundry Screen on the Angular Front-end
This will then redirect you to the UAA login screen. After logging in, if the login was successful, it will redirect you back to the Toolkit front-end.
Tests
To run tests on the Toolkit backend, run:
python manage.py test toolkit.uaa_auth
Tests on the front-end are carried through Cypress, in the uaa.e2e-spec.js file.
NOTE: The UAA server has to be running and configured in order for the tests to work.
Notes on authentication
Upon a successful login to the UAA server, sends a callback to the Toolkit redirect_uri callback, through which another request to the UAA server will be made to obtain an access_token and a refresh_token.
To authenticate Toolkit with the access_token, it needs to be attached to the Authorization (HTTP_AUTHORIZATION) header as a Bearer token in requests. Example: Authorization: Bearer 71428a9f2fb44c52be3c17f2fae405f5.
On every request to the Toolkit REST backend, the Toolkit REST backend will send a request to the UAA server to check whether the token is still valid. If not, it will give a 401 response.
Upon a 401 Unauthorized response from the server, the refresh_token token will be automatically sent by the frontend to Toolkit REST backend’s uaa/refresh-token endpoint with the refresh_token attached to the request body under the field refresh_token.
On the Toolkit REST backend, the refresh token will be used to make a request to the UAA server’s /oauth/token endpoint to get a new access_token. If the refresh_token is invalid or expired, the Toolkit REST backend’s uaa/refresh-token endpoint will give a 403 response.
For reference: https://docs.cloudfoundry.org/api/uaa/version/74.24.0/index.html#refresh-token