Regex Tagger
Regex Tagger is a tool for tagging texts based on predefined regular expressions , i.e. regexes.
Note
Regex Tagger is built on Python’s regex module and thus it’s important to use the same syntax while constructing your patterns.
Creation
The following section covers everything we need to know about creating Regex Taggers. For getting an overview of the input parameters, see subsection Parameters; for creating a Regex Tagger via graphical user interface, see subsection GUI; for creating a Regex Tagger via API, see subsection API.
Parameters
The following section gives an overview of Regex Tagger input parameters.
- description:
Name of the Regex Tagger model, which is also used as name of the tag while tagging the documents.
- lexicon:
List of lexicon entries to match (as comma-separated strings in API or newline-separated strings in GUI).
Note
Lexicon entries can either be regular words (e.g. “cat”), phrases (e.g. “black cat”), or regular expressions containing regex wildcard characters(e.g. “d{2}-d{2}-d{4}”).
- counter_lexicon:
List of annulling lexicon entries, which cancel out nearby (see parameter counter_slop) main lexicon matches. Annulling lexicon entries can similarly to main lexicon entries be regular words, phrases, or regular expressions.
- operator:
Logical operation for matching words in the lexicon.
- Supported options:
- or:
Return positive result if at least one lexicon entry is found.
- and:
Return positive result only if all lexicon entries are found (NB! pay attention to required_words parameter!)
- required_words:
Required minimum ratio of detected lexicon entries to all the lexicon entries for a positive result. E.g. if we have a lexicon consisting of 4 entries and “required_words” = 1.0, all 4 of these entries must appear in the text for positive outcome; if “required_words” = 0.5, only half of the lexicon entries must appear in the text etc.
Note
Has effect only if “operator” = “and”.
- match_type:
Specifies how the lexicon entries are matched.
- Supported options:
- prefix:
Lexicon entry should appear at the beginning of the word/phrase in the text. Subsequent alphanumeric characters are allowed. E.g. Lexicon entry “cat” matches the words “cat” and “caterpillar”, but would not match the word “scattered”.
- exact:
Lexicon entry should match the word/phrase in the text exactly. No preceeding or subsequent characters are allowed. E.g. Lexicon entry “cat” matches the word “cat”, but would not match the words “caterpillar”, and “scattered”.
- subword:
Lexicon entry should match a part of the word/phrase in the text. Preceeding and subsequent characters are allowed. E.g. Lexicon entry “cat” matches the words “cat”, “caterpillar”, and “scattered”.
- phrase_slop:
Number of non-lexicon words allowed between lexicon entry words.
- counter_slop:
Number of non-lexicon words allowed between main lexion entries and counter lexicon entries for the latter to have annulling effect.
- return_fuzzy_match:
If enabled, return the whole alphanumeric string sequence matched, otherwise only the (sub)section exactly matching the original lexicon entry.
- n_allowed_edits:
Number of allowed character changes between lexicon entry and matched string sequence, i.e. Levenshtein distance.
Note
One edit is considered as one of the following:
missing a character, e.g. “cat” -> “ct”
adding a character, e.g. “cat” -> “catt”
substituting a character, e.g. “cat” -> “kat”
- ignore_case:
If set true, ignore case while detecting matches.
- ignore punctuation:
If enabled, ignore end-of-sentence characters between lexicon entry words and/or counter lexicon entries and lexicon entries.
Note
Ignored end-of-sentence characters are: [“.”, “!”, “?”]
Note
Be careful with using the parameter as end-of-sentence characters are detected naively based on list. This means that the parameter restriction applies even if the detected end-of-sentence character doesn’t actually denote the end of a sentence, e.g. each “.” is detected as end-of-sentence character in the sentence “George R.R. Martin and J.R.R. Tolkien went fishing”.
GUI
For creating a new Regex Tagger model, navigate to “Models” -> “Regex Taggers” as seen in Fig. 81.
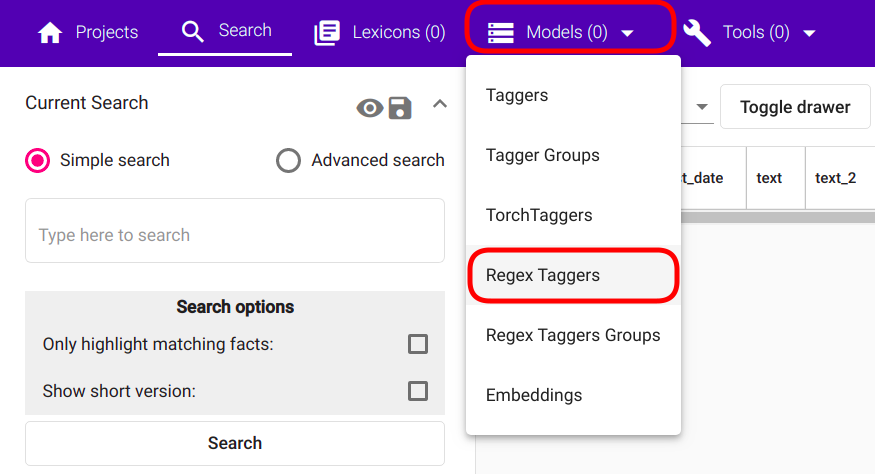
Fig. 81 Regex Taggers navigation
If the navigation is successful, you should see a panel similar to Fig. 82 with “Create” button in the top left corner of the page.
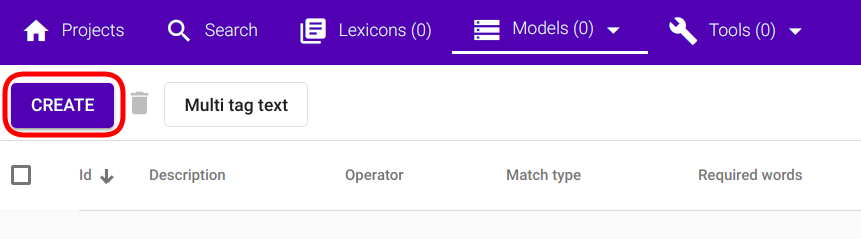
Fig. 82 Regex Tagger creation button
Clicking on the “Create” button opens a modal window with text “New Regex Tagger” as depicted in Fig. 83.
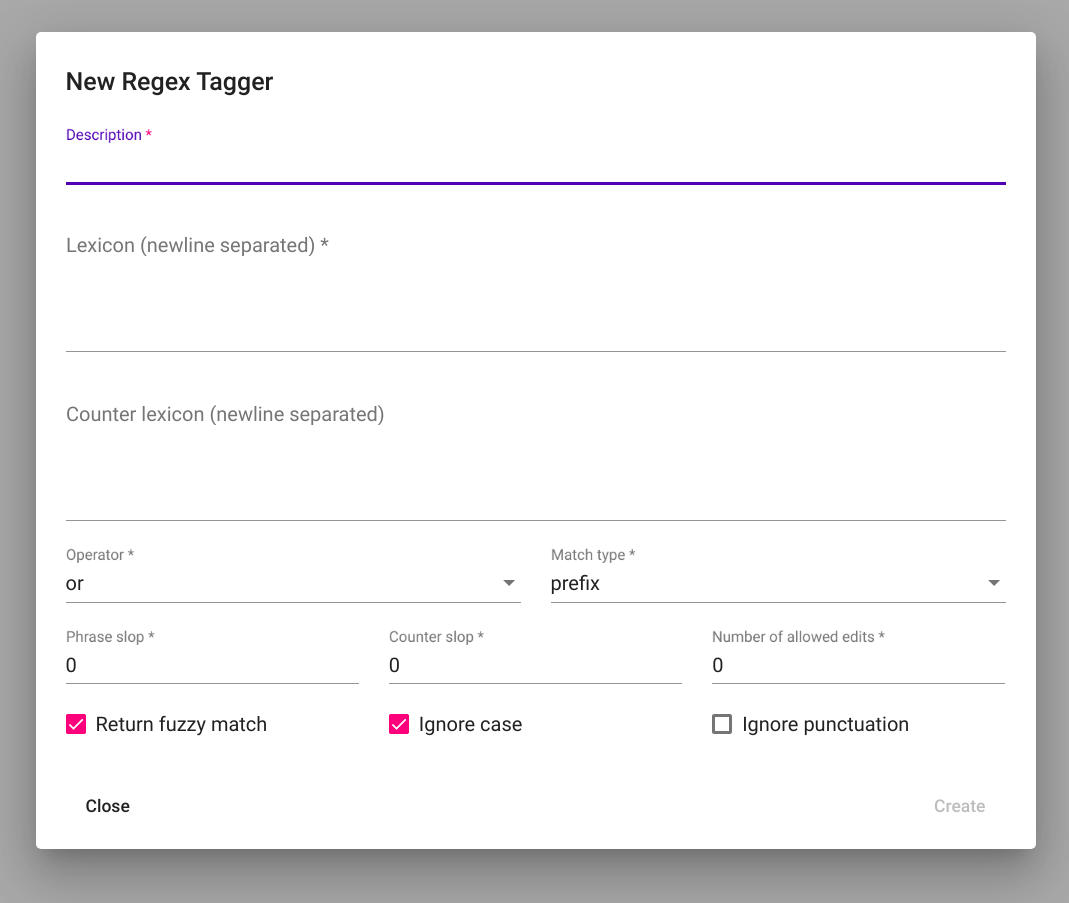
Fig. 83 Empty Regex Tagger creation view
Fill the required fields and click on the “Create” button in the bottom right corner of the window (Fig. 84).
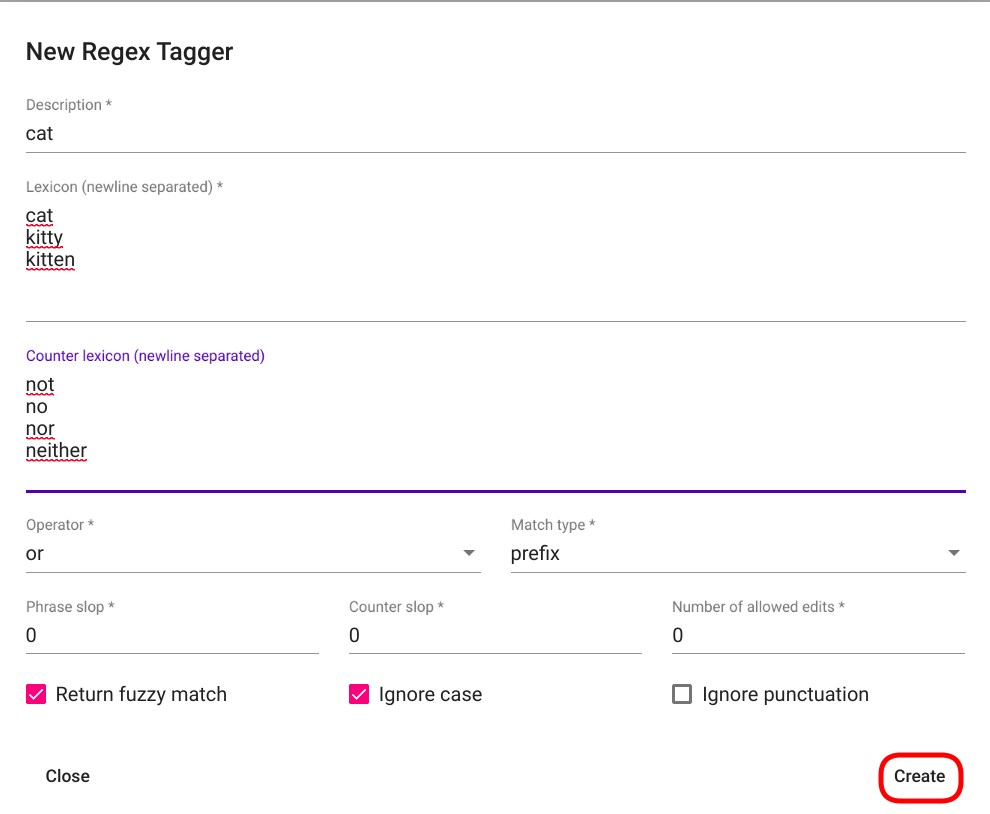
Fig. 84 Filled Regex Tagger creation view
The created Regex Tagger can now be seen as the first (or only, if no previous Regex Taggers exist under the project) row in the table of Regex Tagger models (Fig. 85).

Fig. 85 List of Regex Taggers.
API
Endpoint /projects/{project_pk}/regex_taggers/
Example:
curl -X POST "http://localhost:8000/api/v1/projects/1/regex_taggers/" \
-H "accept: application/json" \
-H "Content-Type: application/json" \
-H "Authorization: Token 8229898dccf960714a9fa22662b214005aa2b049" \
-d '{
            "description": "cat",
            "lexicon": ["cat", "kitten", "kitty"],
            "counter_lexicon": ["no", "not", "nor", "neither"],
            "operator": "or",
            "match_type": "prefix",
            "required_words": 1.0,
            "phrase_slop": 0,
            "counter_slop": 0,
            "n_allowed_edits": 0,
            "return_fuzzy_match": true,
            "ignore_case": true,
            "ignore_punctuation": false
        }'
Response:
{
        "id": 131,
        "url": "http://localhost:8000/api/v1/projects/1/regex_taggers/131/",
        "author_username": "my_username",
        "description": "cat",
        "lexicon": [
                        "cat",
                        "kitten",
                        "kitty"
        ],
        "counter_lexicon": [
                        "no",
                        "not",
                        "nor",
                        "neither"
        ],
        "operator": "or",
        "match_type": "prefix",
        "required_words": 1.0,
        "phrase_slop": 0,
        "counter_slop": 0,
        "n_allowed_edits": 0,
        "return_fuzzy_match": true,
        "ignore_case": true,
        "ignore_punctuation": false,
        "tagger_groups": []
}
Usage
The following section covers all functions supported by Regex Tagger. PS! Some of the functions can only be applied through API as they have no meaningful usage scenarios in GUI.
Delete
Function “Delete” allows deleting existing Regex Tagger models.
GUI
For deleting a Regex Tagger model through GUI, navigate to “Models” -> “Regex Taggers” as seen in Fig. 81. There are two options for deleting a Regex Tagger model:
Option 1:
Select the model you wish to delete by navigating to the options panel denoted with three vertical dots as seen in Fig. 98 and select option “Delete” from the selection menu as seen in Fig. 86.
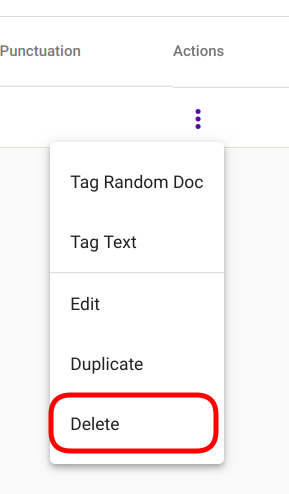
Fig. 86 Delete a single Regex Tagger
Option 2:
Select the model(s) you wish to delete by clicking on the selection boxes in front of Regex Tagger model(s) (Fig. 87). If all the models you wish to delete are selected, click on the red recycle bin icon beside “Create” button in the top left corner of the page.
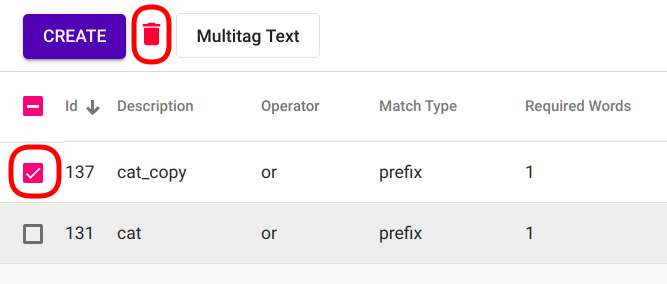
Fig. 87 Bulk delete Regex Tagger(s)
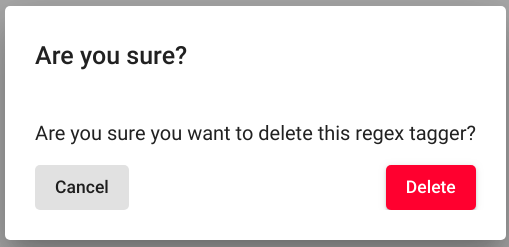
Fig. 88 Delete Regex Tagger(s) confirmation
After following all the previously described steps (for either of the two options), the interface should now ask your confirmation for finishing the process (Fig. 88). Agree by clicking on the button “Delete”.
API
Endpoint /projects/{project_pk}/regex_taggers/{id}/
Example:
curl -X DELETE "http://localhost:8000/api/v1/projects/1/regex_taggers/131/" \
     -H "Authorization: Token 8229898dccf960714a9fa22662b214005aa2b049"
Duplicate
Function Duplicate allows making a copy of an existing Regex Tagger. It is especially useful if you are fine-tuning a specific model but aren’t sure that the modifications will actually improve it - just make a copy before you start editing.
GUI
For duplicating a Regex Tagger model, navigate to “Models” -> “Regex Taggers” as seen in Fig. 81. Select the model you wish to duplicate and navigate to options panel denoted with three vertical dots as seen in Fig. 98.
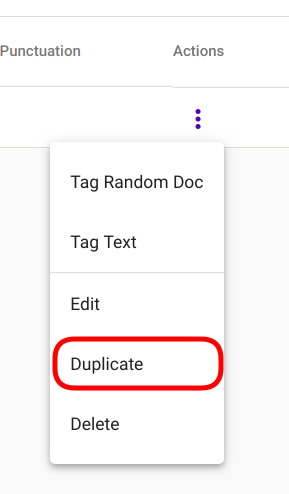
Fig. 89 Duplicate Regex Tagger
Select option “Duplicate” from the selection menu as seen in Fig. 89.

Fig. 90 Duplicated Regex Tagger
Selecting the option instantly triggers the duplication process and the duplicated Regex Tagger model appears in the list of Regex Tagger models with name “<source_tagger_name>_copy” (Fig. 90).
API
Endpoint /projects/{project_pk}/regex_taggers/{id}/duplicate/
Example:
curl -X POST "http://localhost:8000/api/v1/projects/1/regex_taggers/131/duplicate/" \
-H "accept: application/json" \
-H "Content-Type: application/json" \
-H "Authorization: Token 8229898dccf960714a9fa22662b214005aa2b049" \
-d '{}'
Response:
{
    "message": "Tagger duplicated successfully!",
    "duplicate_id": 134
}
Edit
Function “Edit” allows editing existing Regex Tagger models.
GUI
For editing a Regex Tagger model, navigate to “Models” -> “Regex Taggers” as seen in Fig. 81. Select the model you wish to edit and navigate to options panel denoted with three vertical dots as seen in Fig. 98.
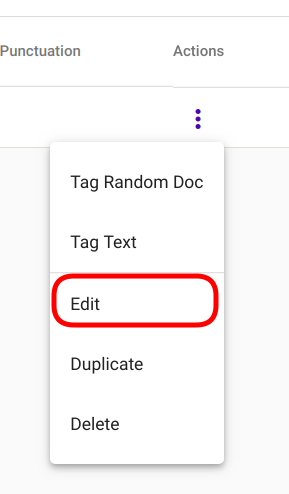
Fig. 91 Edit Regex Tagger
Select option “Edit” from the selection menu as seen in Fig. 91.
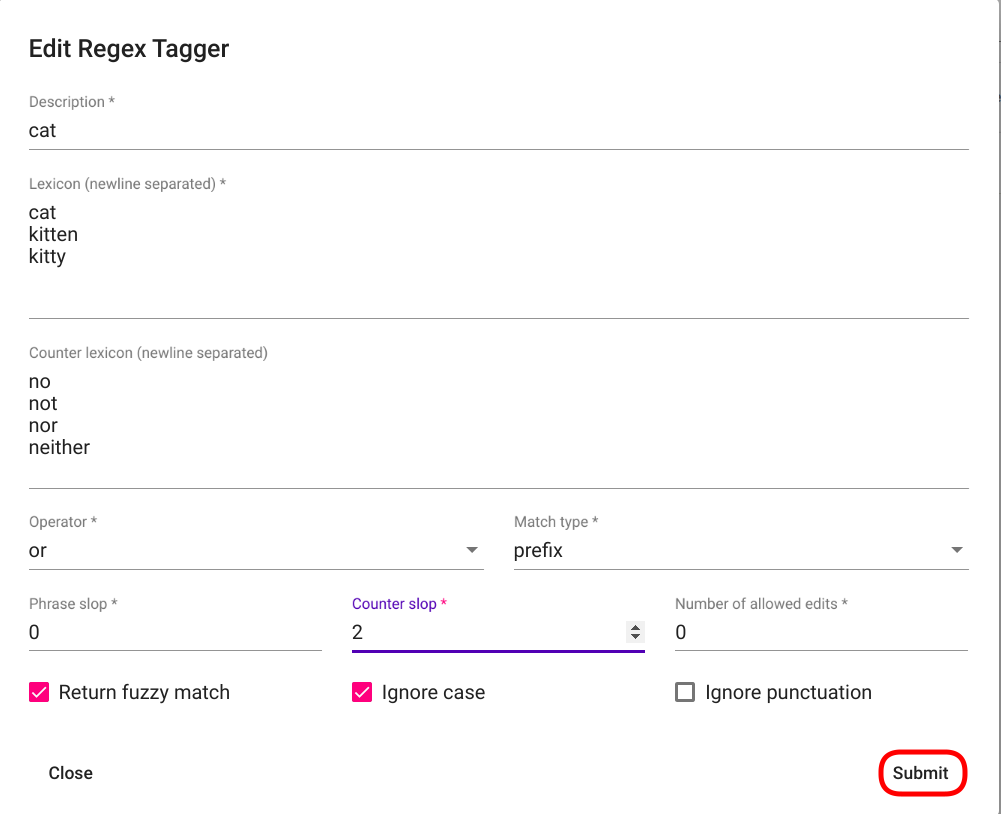
Fig. 92 Edit Regex Tagger modal window
Selecting the option opens a new modal window “Edit Regex Tagger”. Make your modifications and click on “Submit” button in the bottom right corner of the panel (Fig. 92).
API
Endpoint /projects/{project_pk}/regex_taggers/{id}/
Example:
curl -X PATCH "http://localhost:8000/api/v1/projects/1/regex_taggers/131/" \
-H "accept: application/json" \
-H "Content-Type: application/json" \
-H "Authorization: Token 8229898dccf960714a9fa22662b214005aa2b049" \
-d '{
        "counter_slop": 2
    }'
Response:
{
        "id": 131,
        "url": "https://rest-dev.texta.ee/api/v1/projects/1/regex_taggers/131/",
        "author_username": "my_username",
        "description": "cat",
        "lexicon": [
                        "cat",
                        "kitten",
                        "kitty"
        ],
        "counter_lexicon": [
                        "no",
                        "not",
                        "nor",
                        "neither"
        ],
        "operator": "or",
        "match_type": "prefix",
        "required_words": 1.0,
        "phrase_slop": 0,
        "counter_slop": 2,
        "n_allowed_edits": 0,
        "return_fuzzy_match": true,
        "ignore_case": true,
        "ignore_punctuation": false,
        "tagger_groups": []
}
Tag Random Doc
“Tag Random Doc” is a helpful function for testing Regex Tagger models on random documents.
GUI
For tagging a random document with an existing Regex Tagger model, navigate to “Models” -> “Regex Taggers” as seen in Fig. 81. Select the model you wish to use and navigate to the options panel denoted with three vertical dots. Select the option “Tag Random Doc” from the selection menu as seen in Fig. 93.

Fig. 93 “Tag Random Doc” option in the selection menu
Selecting the option opens a new modal window with the title “Tag Random Doc”. Select the index or indices you wish to use from the “Indices” selection menu displayed in the window after clicking on the corresponding section and select the field(s) you wish to use from the “Select Fields” selection menu below. If finished, click on the button “Tag” in the bottom right corner of the panel (Fig. 94).
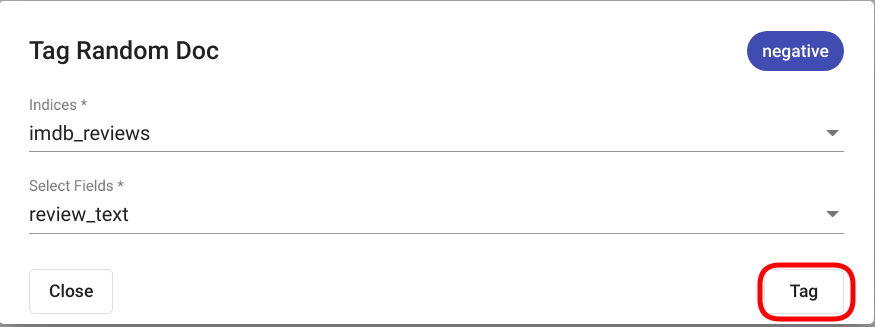
Fig. 94 Regex Tagger “Tag Random Doc” window.
The results are displayed in the same modal window as seen in Fig. 95 if any matches were detected. If no matches where found, the text “No matches found” is displayed as seen in Fig. 96.
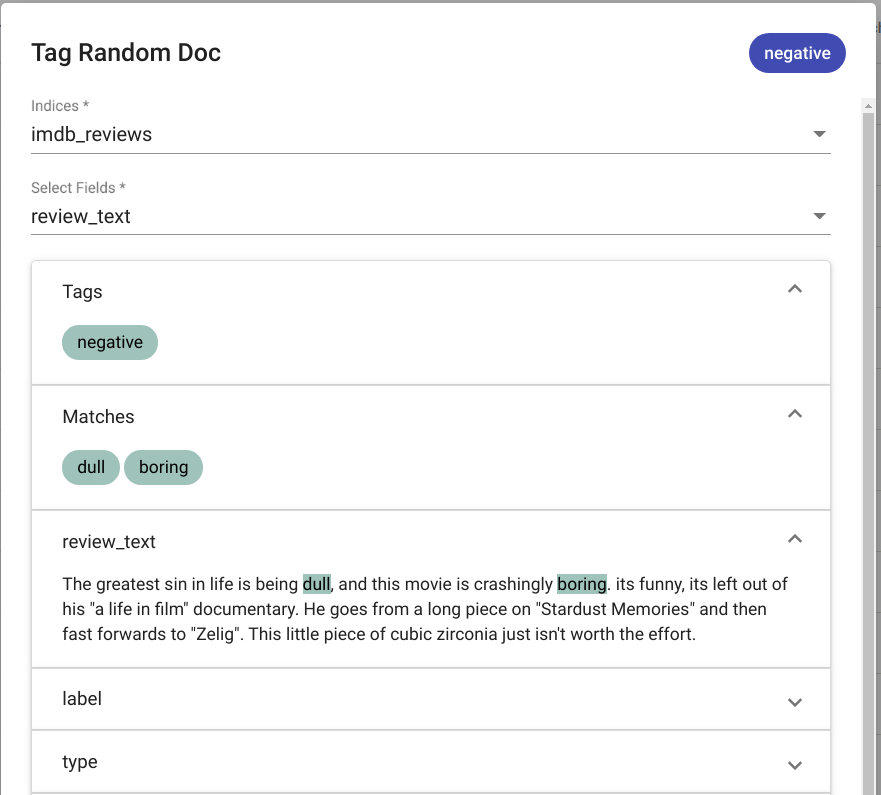
Fig. 95 “Tag Random Doc” positive output
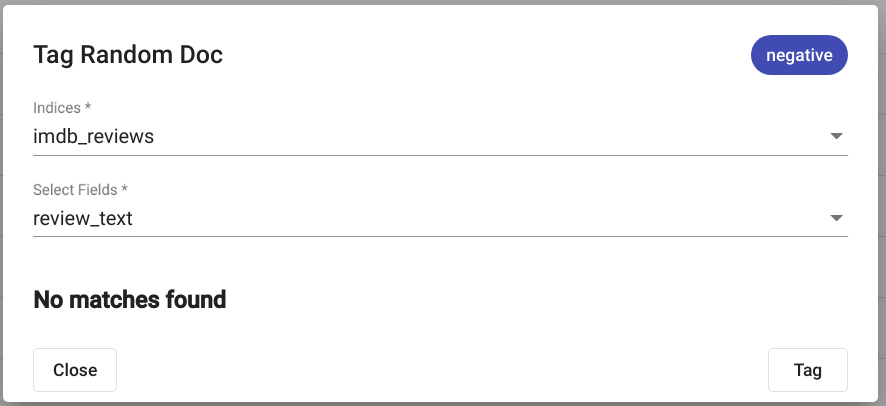
Fig. 96 “Tag Random Doc” negative output
PS! The fields in the document not selected by the user and/or not containing any matches are by default collapsed, but you can view their content by clicking on the arrow icon at the end of each field (Fig. 97.)
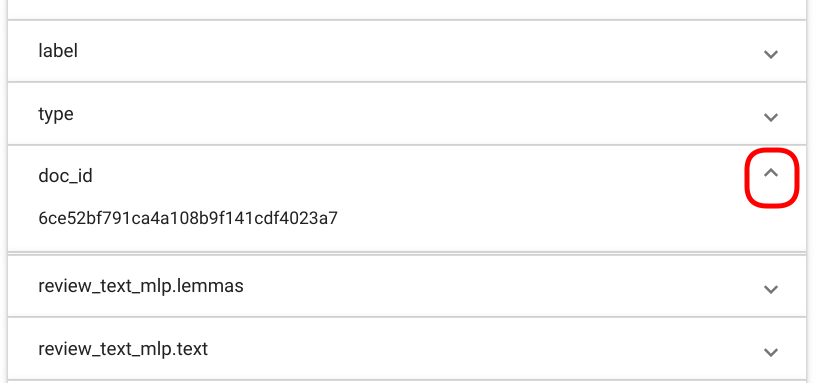
Fig. 97 “Tag Random Doc” collapsing/uncollapsing fields.
API
Endpoint /projects/{project_pk}/regex_taggers/{id}/tag_random_doc/
Example:
curl -X POST "http://localhost:8000/api/v1/projects/1/regex_taggers/138/tag_random_doc/" \
-H "accept: application/json" \
-H "Content-Type: application/json" \
-H "Authorization: Token 8229898dccf960714a9fa22662b214005aa2b049" \
-d '{
    "indices": [{"name": "imdb_reviews"}],
    "fields": ["review_text"]
  }'
Response (positive):
{
        "tagger_id": 138,
        "tag": "positive",
        "result": true,
        "matches": [
                {
                        "fact": "positive",
                        "str_val": "awesome",
                        "spans": "[[787, 794]]",
                        "doc_path": "review_text",
                        "source": "{\"regextagger_id\": 138}"
                },
                {
                        "fact": "positive",
                        "str_val": "good",
                        "spans": "[[911, 915]]",
                        "doc_path": "review_text",
                        "source": "{\"regextagger_id\": 138}"
                },
                {
                        "fact": "positive",
                        "str_val": "good",
                        "spans": "[[1032, 1036]]",
                        "doc_path": "review_text",
                        "source": "{\"regextagger_id\": 138}"
                }
        ],
        "document": {
                        "review_text": "I for one was very anxious to watch this movie. Though I knew it was going to be another type of movie in the style of Revenge of the Nerds, I was still impressed. There is plenty of truth to the fact of this type of learning and believe very strongly that it should be allowed in a \"new style of schooling\". Conventional teaching methods do not always teach students what they need to know or should know or want to know. This approach to teaching should be further sought out in true academic courses. While there still was too much of the partying scenes, it obviously had to be thrown in there - for Hollywood's sake of making a comedy about college...even though we all know that life isn't really like that by any means. A touch unbelievable, still funny and with a killer ending. Awesome ending. Crucial to the entire story and very surprising. Without the final scene, the movie would have been half as good. I liked this movie and it didn't have to have overly amounts of swearing or nudity or gross out jokes for it to be good. Great crew and cast, story and even the generic typecasting of the obligatory \"Hampton frat members\" was well done. American Pie 1, 2 3 and American Wedding or whatever clones it makes doers not measure up to this by 1/3. Far better than most comedies about first year College with no demeaning stupid jokes to make somebody throw up with. I liked it, even though it was simple...it was interesting and even had heart...my only regret for watching this movie is that it wasn't longer.",
                        "label": "positive",
                        "type": "test",
                        "doc_id": "efa2c957ce7c4588b91ef25ad2306390"
        }
}
Response (negative):
{
        "tagger_id": 138,
        "tag": "positive",
        "result": false,
        "matches": [],
        "document": {
                "review_text": "Previous comments encouraged me to check this out when it showed up on TCM, but it was a severe disappointment. Lupe Valdez is great, but doesn't get enough screen time. Frank Morgan and Eugene Palette play familiar but promising characters, but the script leaves them stranded. The movie revolves around the ego of Lee Tracy's character, who is at best a self-centered, physically and verbally abusive jerk. The reactions of \"the public\" are poorly thought-out and unbelievable, making the \"shenanigans\" seem like contrivances of a bad writer. And it strains credulity that the Lupe Velez character could fall for him. The \"stinging one-liners\" mentioned in another review must be dependent on the observer, since I didn't even notice that an attempt was being made.",
                "label": "negative",
                "type": "train",
                "doc_id": "6eec458e238d4cf58882b50e8df82855"
        }
}
Tag Text
Function “Tag Text” enables tagging a single text with a selected Regex Tagger model.
GUI
For tagging a text with an existing Regex Tagger model, navigate to “Models” -> “Regex Taggers” as seen in Fig. 81.
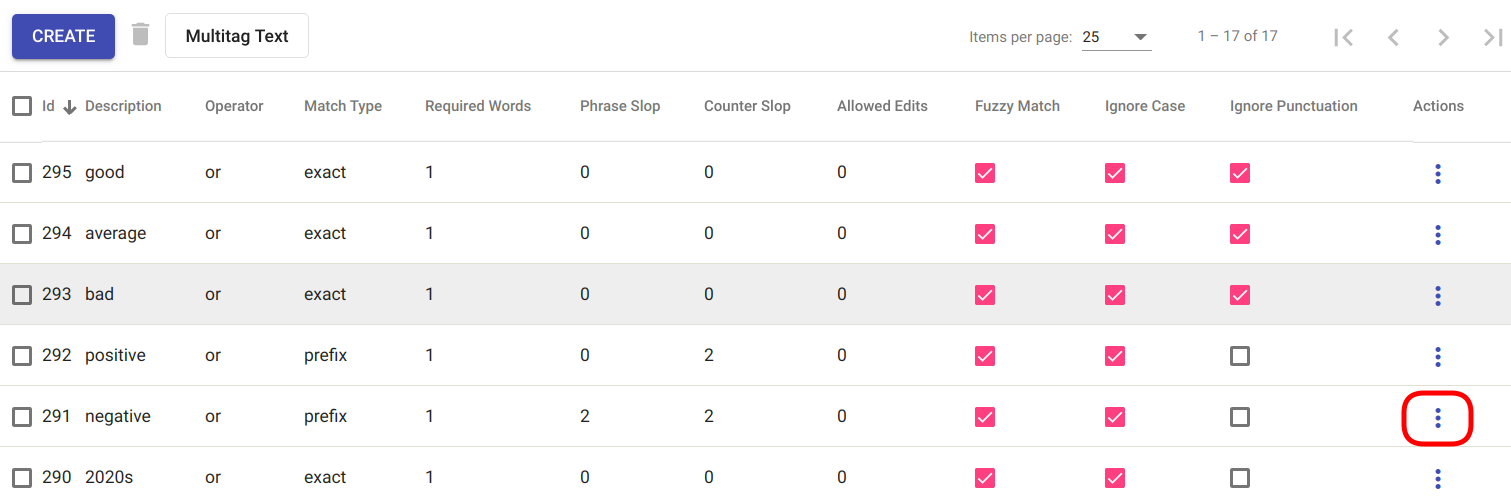
Fig. 98 List of existing Regex Tagger models
Select the model you wish to use and navigate to options panel denoted with three vertical dots as seen in Fig. 98.
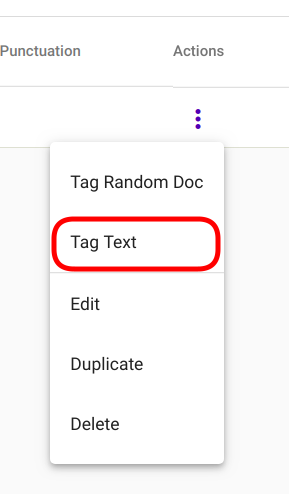
Fig. 99 Tag Text option in selection menu
Select option “Tag Text” from the selection menu as seen in Fig. 99.
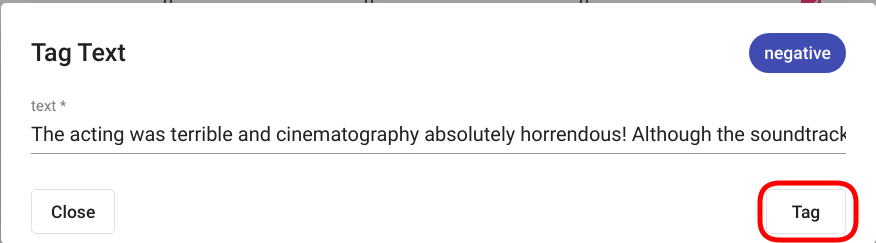
Fig. 100 Tag Text modal window
Selecting the option opens a new modal window “Tag Text”. Insert the text you wish to tag and click on the button “Tag” in the bottom right corner of the panel (Fig. 100).

Fig. 101 Tag Text positive output
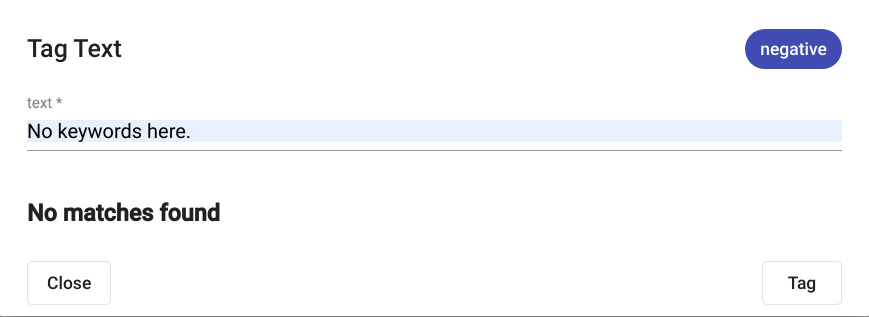
Fig. 102 Tag Text negative output
The results are displayed in the same modal window as seen in Fig. 101 if any matches where detected. If no matches where found, the text “No matches found” is displayed as seen in in Fig. 102.
API
Endpoint /projects/{project_pk}/regex_taggers/{id}/tag_text/
Example:
curl -X POST "http://localhost:8000/api/v1/projects/1/regex_taggers/131/tag_text/" \
-H "accept: application/json" \
-H "Content-Type: application/json" \
-H "Authorization: Token 8229898dccf960714a9fa22662b214005aa2b049" \
-d '{
        "text": "one cat, two dogs and seven kittens"
    }'
Response:
{
    "tagger_id": 131,
    "tag": "cat",
    "result": true,
    "text": "one cat, two dogs and seven kittens",
    "matches": [
        {
            "fact": "cat",
            "str_val": "cat",
            "spans": "[[4, 7]]",
            "doc_path": "text",
            "source": "{\"regextagger_id\": 131}"
        },
        {
            "fact": "cat",
            "str_val": "kittens",
            "spans": "[[28, 35]]",
            "doc_path": "text",
            "source": "{\"regextagger_id\": 131}"
        }
    ]
}